Make deep fake pictures and videos with Roop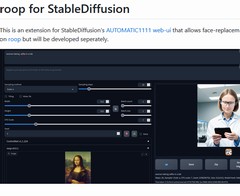
Roop is a project to create deep fake contents.
It exists on Github as 2 different projects:
- One is a standalone project to create deep fake videos, but also pictures.
- The other one is an extension for stable diffusion's interface Automatic1111 and it allows to create deep fake of pictures.
The main advantage of Roop on other projects to create deep fakes (i didn't test so many before) is that it is quite easy to use.
Basically, one it is installed, in 3 clicks, the deep fake is done.
My opinion as a tester is that the result in convincing enough but i wouldn't call it perfect.
For example, i don't think it handles colors very well.
Below is an example:
 |
+  |
= 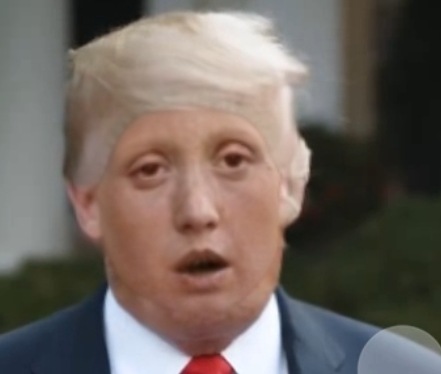 |
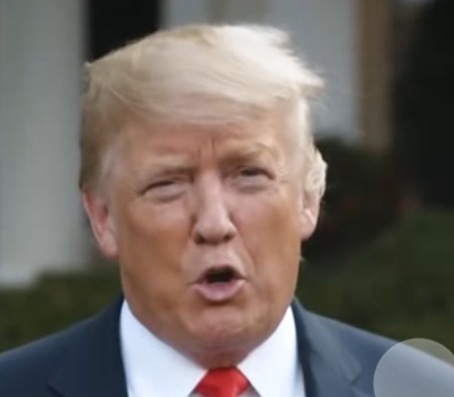
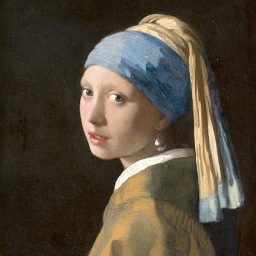
I used roop for videos to create this (this is just a screenshot). The starting point is a random video of Donald Trump making a speech and the face used a a reference is a painting from Johannes Vermeer, the famous "Girl with a Pearl Earring".
The frame of real Donald Trump and the frame of fake Trump without Pearl Earring are probably not exactly 100% the same, but they are close enough to give an idea of the result.
What you are supposed to see is the line that seems to appear at the bottom of the face of fake Trump. This line is basically where the face is supposed to end. The color of the face of the real Donald Trump is more uniform. Probably because on the left picture, it is hard to see where the face ends and if the neck is visible or not. A similar comment could be made with the hair: there seems to be some kind of line. They look less natural on the deep fake picture. It looks like someone has edited the picture to add some kind of wig that gives some kind of line. Also, on the picture used as a reference, since the girl is wearing some kind of "oriental turban", that may be why on the deep fake, the hair look so fake on the deep fake picture...
So Roop is a fast and easy solution to make some deep fakes but the results may not always be perfect. Anyway, for humoristic spoofings, where perfection is not the point, it is anyway good enough.
How to use Roop ?
-1 How do i use Roop for video ?
a) Installation
First of all, Roop is right now under active development, which means that this article may come obsolete very soon.
With a Windows system, you may have to install the visual studio 2022 runtimes on your computer.
(I've already installed that before, so I didn't really need it.)
I 've have decided to install Roop in a conda environment:conda create --name roop python=3.10.6conda activate roop
Then i go to the directory where i want to install Roop, and i do a:git clone https://github.com/s0md3v/roopcd rooppip install -r requirements.txtpython run.py
(this command runs the program in cpu version)python run.py --execution-provider cuda
To run with Cuda
At this point, Roop will try to download the ".onnx" model if it needs it.
If you experience any problem, feel free to check the official manuals here and here.
Then just select a picture with a face, a "target" (the video of the picture you have to modify) and click on Start.
If you select "many faces" the software will replace all the faces, if not just the first it finds (maybe not the one you want).
The extension of Roop for Automatic1111 gives a bit more control.
-2 How do i use Roop for pictures as an extension for Automatic1111 ?
The extension of Roop for Automatic1111 can be used in several different ways.
-1 It can be used instead of a Lora or a Textual Inversion file, to give more realism to a caricature. (It will make the picture look more like the original character.)
Example:
Without Roop:
Prompt: Francois Hollande serious ruler of the french
Steps: 20, Sampler: Euler a, CFG scale: 7, Seed: 1412642201, Size: 512x512, Model hash: c8094fea44, Model: aZovyaRPGArtistTools_v3VAE, Version: v1.4.0
With Roop and this picture:
Former French President Francois Hollande, Source Wikipedia/Flickr)
You get this result (same seed):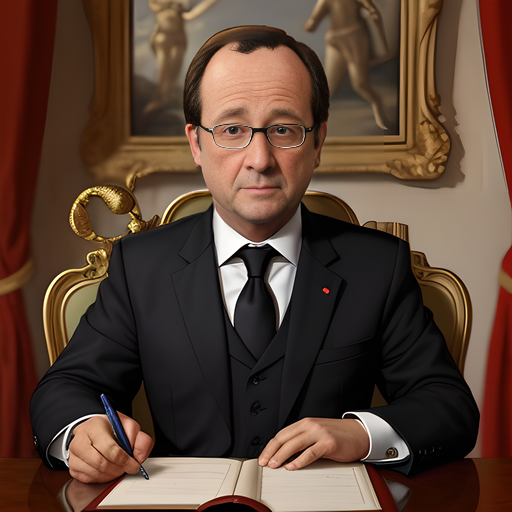
And has you can see, the face (and the glasses) looks now more real.
The face in the deep fake is actually not the same face, but more an interpretation of the face with the constraint of the pictures.
-2 It can be used to replace a face (to some extent)
Again, the result will be an interpretation of the face with another picture as reference.
If the source and the target have a different body shape, the resulting content is not going to be mysteriously similar to the reference picture, because Roop only alters the face.
Therefore to get good results, the reference face and the target content have to look as similar as possible.
To replace a face, i go in the img2img tab of automatic1111.
Then i load in the img2img tab the reference picture.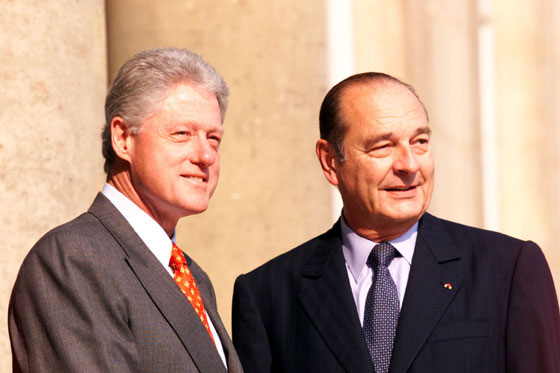
(Clinton and Chirac, source: https://commons.wikimedia.org/wiki/File:Clintonchirac.jpg)
In the Roop menu i load the reference picture: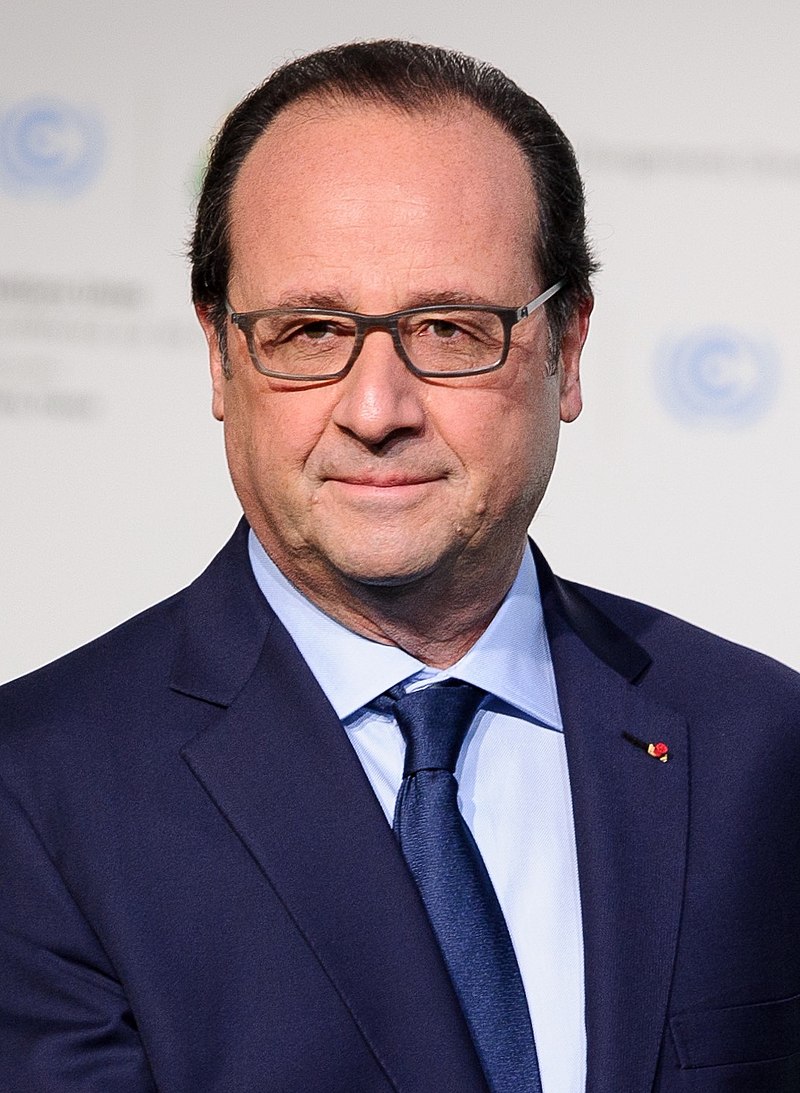
(Former French President Francois Hollande, Source Wikipedia/Flickr)
I want to replace the face of J. Chirac only and it seems to be the 2nd face, so i set " Comma separated face number(s)" to 1 (face 0 is Clinton's)
Also I put the denoising strength to 0 (I want to keep the original picture as a reference).
Then I need to change the size of the picture to original one. So I click on the "Try Square" icon (it has this description when the mouse is over the button: "Auto detect size from img2img").
Restore face can make the picture look better, but it will correct all the faces, including the original faces, even when they shouldn't be modified (here including the face of Clinton, even if I don't try to modify it).
An upscaler also tends to smooth the pictures.
Without "restore face" and "upscaler", the picture tends to become more blurry.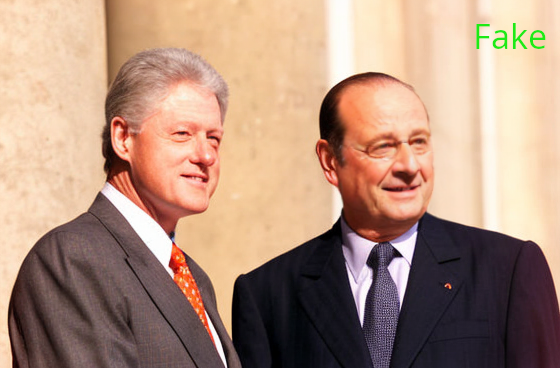
Above: Without "restore face" and without an upscaler
Above: With just the "restore face" option.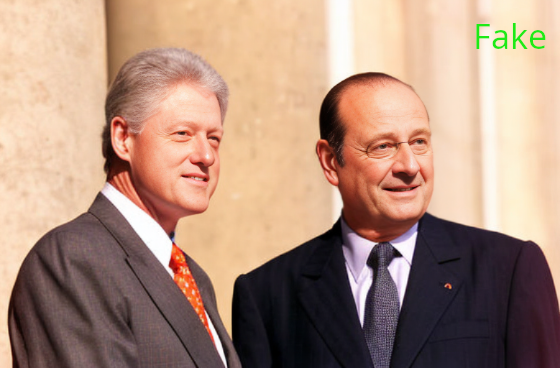
Above: With the "restore face" and an upscaler (ESRGAN_4x).
With the 3 different sets of options that i have selected, the result that is the closest to the one I expect, is the second one (with restore face), because it is the one that respect the best, the original picture.
Without "restore face", the face of Hollande looks blurrier than the face. With the "restore face" option, i find the result subtly better.
Finally, with the "restore face" option and an upscaler, everything looks sharper and enhanced... even the face of Clinton, that i didn't want to modify (check the eyes and the skin).
On all these pictures and if you are familiar with the faces of the French politicians, you can see that the result doesn't really look like Francois Hollande, it still looks a bit like Jacques Chirac, because the overall aspect of the face of Chirac (the skull) is still
not the one of Hollande.
-3 Finally, it can be used additionally to a prompt, to give to the picture the face of a character that is not known.
Like in the -1 you generate a picture and you ask to the Roop plugin to replace the face of the picture, but this time the checkpoint doesn't know the name of your character.
If a character is well known, just do like in the -1 and use the name of the character in the prompt. If the checkpoint knows the name of the character, you will get something that looks somewhat like him/her, with somewhat correct proportions of the body.
You are not going to get that if the character is unknown (and it is less good for you).
The difference with the -2 is that your starting point is a text prompt and not an existing picture.
I am not going to use any home-made example, just check this sample picture of the Roop project: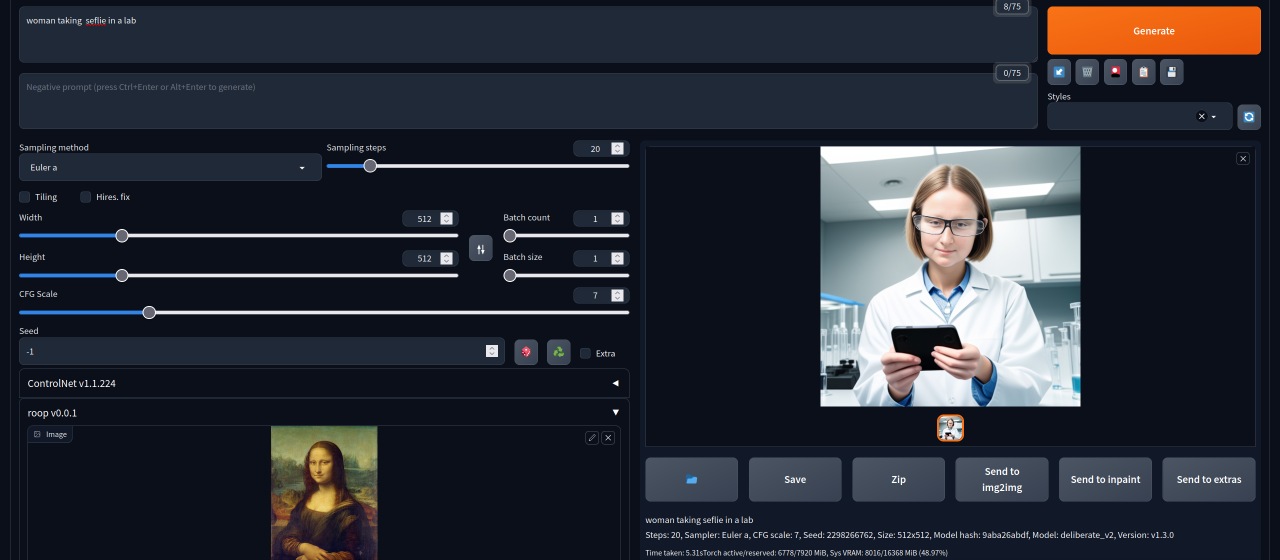
Also if you have to change several faces, send the generated picture to img2img. Select there a minimal denoising strength (0) with restore face or not and an upscaler or not (see -2 ).