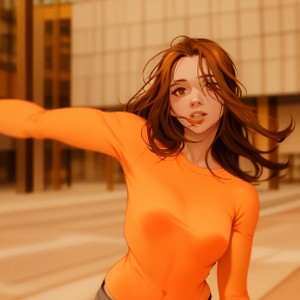
If you click on the picture above, you will be redirected
to the post where i published this video for the first time.
I was asked how i did the very specific part of the video where i use the face of the woman of the original video to create the content.
If you don't know what this is all about, read this post on github. Or click on the thumbnail above.
Open DiffEx (here 1.5) and enter these data: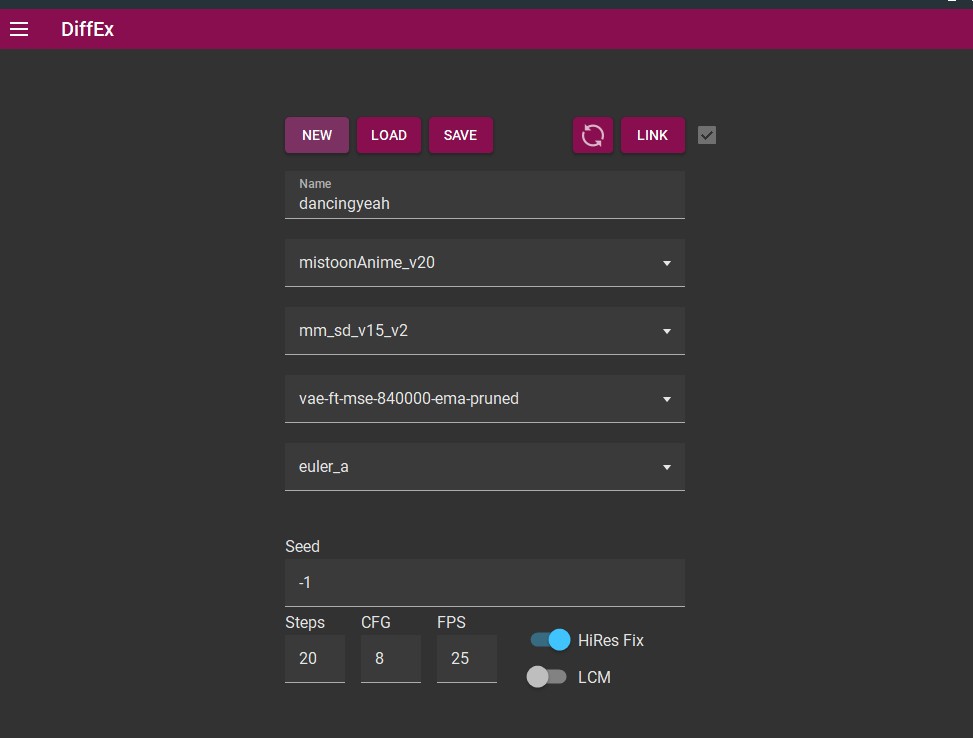
Name: dancingyeah
Model: MistoonAnime_v20 (the link may content NSFW content)
Motion Model: mm_sd_v15_v2
VAE: vae-ft-se-840000-ema-pruned
Scheduler: euler_a
Seed: 341774366206100 (not like on the screenshot)
steps: 20,
CFG: 8
FPS: 25
Hires Fix: yes
So, here you SAVE.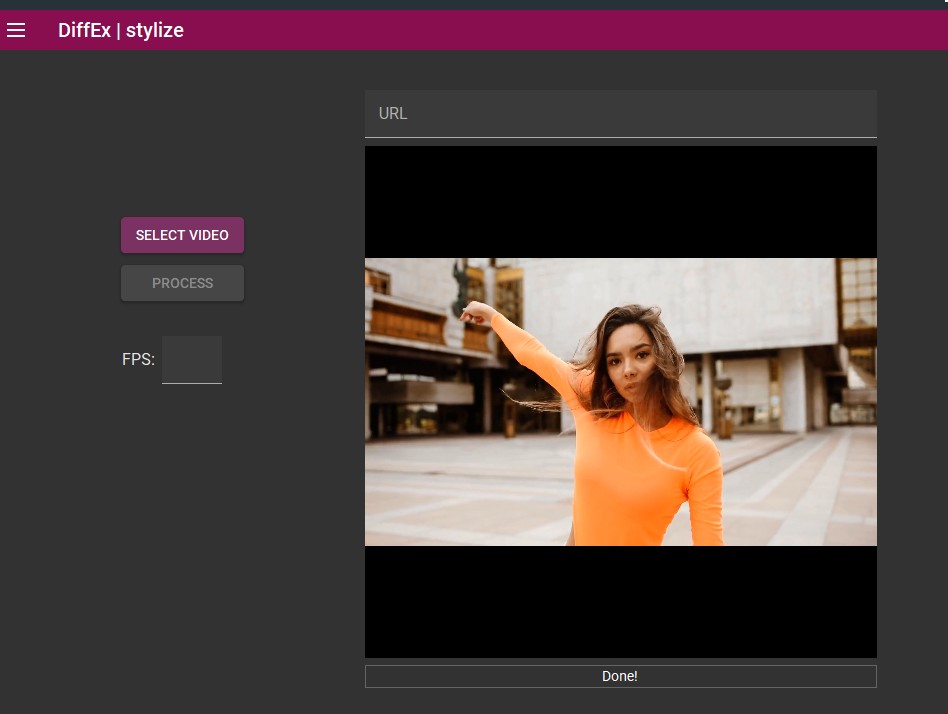
Go to the Stylize menu and select your video. The video can be found here (you have to download it). Video credit: pexels (note that the video on Pexels is longer)
Then click on process and wait that the computer does the job (Cuda is never used for this part and the software will tell it is not available in v1.5).
Go then to the prompt menu: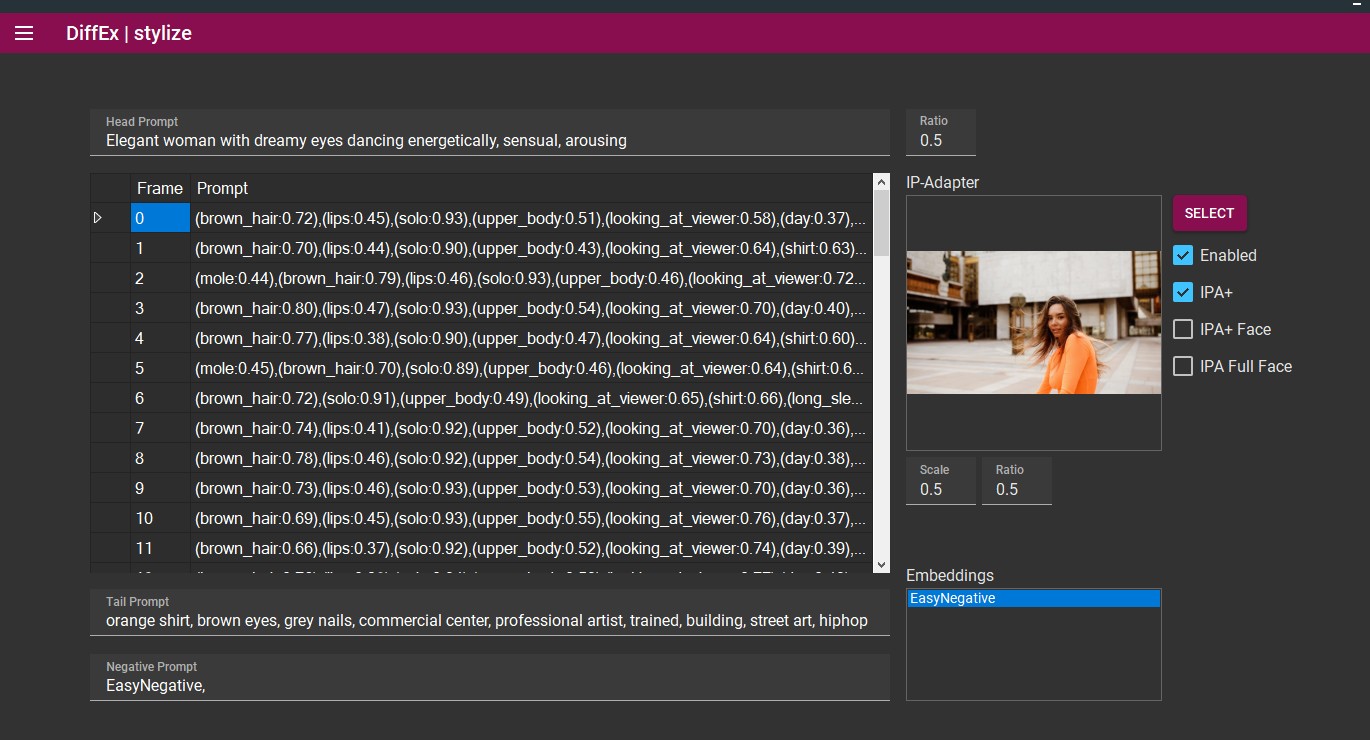
If you reach the prompt menu, you should see that all the available frames should have been populated. That makes a total of 67 frames.
Now the keywords that i used myself: The keywords are related to the content i want to produce.
This is not some kind of indirect comment on the original video.
It is up to you to tell if the original video is already like that or not. I used these keywords because i wanted to render the resulting video in a better way.
Head Prompt: Elegant woman with dreamy eyes dancing energetically, sensual, arousing
Tail Prompt: orange shirt, brown eyes, grey nails, commercial center, professional artist, trained, building, street art, hiphop
Negative Prompt: (click on the embeddings "EasyNegative")
(A problem with that ?: download and put the file here: animatediff-cli-prompt-travel\data\embeddings )
For IP-adapter, i used the frame named: 00000057.png of the video (likely the 58th frame)
You can extract this frame yourself, or you could do a first rendering without the ip-adapter and then go to a subfolder "img2img" (example: diffexDesktopUIFor_v15\animatediff-cli-prompt-travel\stylize\2024-01-27T00-41-08-dancingyeah-mistoonanime_v20\00_img2img ) and take the frame with this name.
Then go to "ControlNet":
Select "AnimateDiff", Enable it and select "use Preprocessor", with a scale of 0.6.
Then go to Openpose: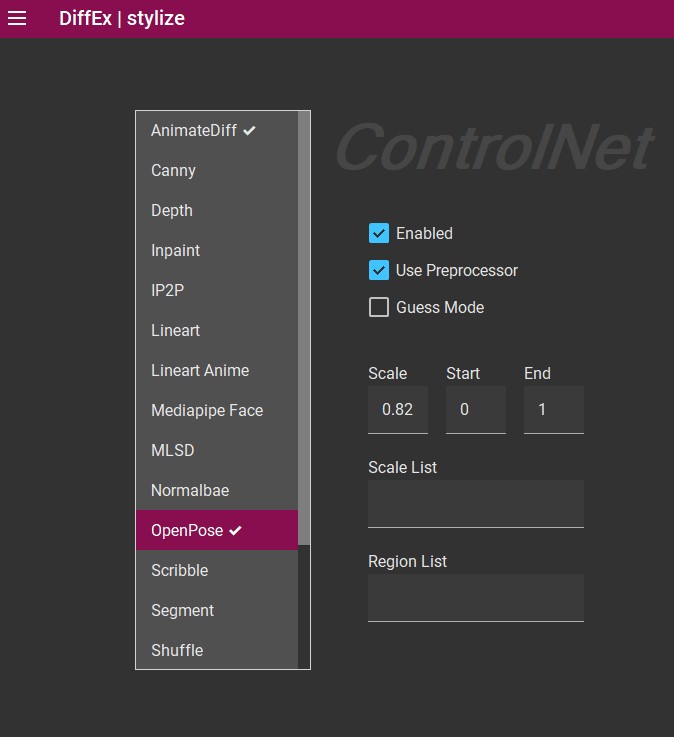
Enable it and use the preprocessor, with a scale of 0.82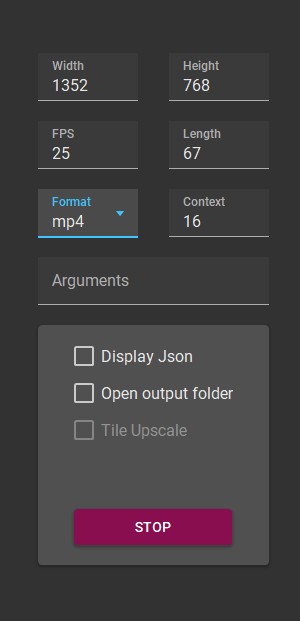
And use the following data:
Width: 1352
Height: 768
Format: mp4 (what you want, actually)
Length: 67
Context: 16
It could be useful to click on "Open Output folder" if you don't know where DiffEx saves the data.
Then click on "Build & Run" (not like on the screen capture).
And this is the result that i get if i render the video as a Gif file. (Gif files have a bigger size than mp4).
Side notes:
How to load a previous configuration file with DiffEx ?
If you selected "Open Output folder", you should see a folder that opens once the rendering is finished. This folder contains one or two JSON file(s).
"prompt.json" has your seed.
If you go to the first panel and click on load, you can actually load again your previous data.
If you use this JSON, in this directory, for DiffEx 1.5, i think that you have to stylize the original video again, if you want to reuse your data.
I think that the JSON of the parent folder (the directory level above the rendered video) saves the data to render the video correctly.
(It means that it is likely faster to load the Json of the parent folder.)
What is this story about deleting frames and making a new video with FFmpeg ?
This question refers to a comment that I did in this video.
In the directory that contains the original video, there is a directory name that includes the seed that you used.
If you open this folder, you can see the pictures that were used at the end of the generation, to create the actual video.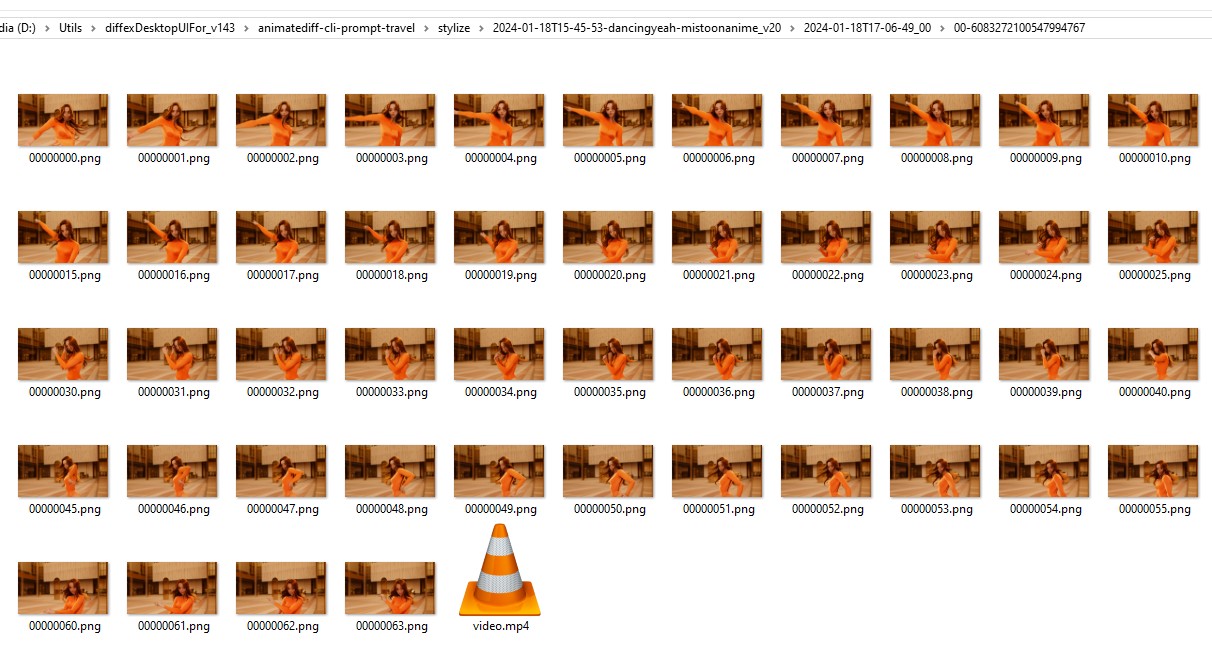
Obviously, on the screenshot above, the file video.mp4 is one that i generated myself with FFMpeg.
So here, you could just remove some of the frames and generate a video again.
If your files have an order, you can use it to ask FFmpeg to generate a video from them.
Note that the FFMpeg command that you use may vary.
If all the files are in a perfect order: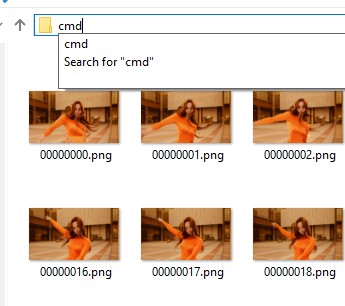
Type "cmd" in the address bar of Windows explorer: this opens a command prompt and in it, type:ffmpeg -r 25 -s 1920x1080 -i %08d.png -vcodec libx264 -crf 25 -pix_fmt yuv420p testing.mp4
Explanation: -r is the frame rate: here we wanted 25 fps
-s 1920x1080: the resolution, so here i increase the size of the video
-i %08d.png this works because you have 8 zeros in a name
First frame: 00000000.png
With names like 0000.png, you should use %04d.png, instead.
testing.mp4 is the name of the output file.
You can also use the command:-start_number 1
The other data are related to the output quality and codec that you want.
Now if you try this command and some files are missing like:
00000034.png, 00000035.png, 00000037.png, 00000038.png
(36 is missing)
You can't use this command.
If you are on a windows system, every command using glob is likely not going to be available.
So, in case one file is missing, you could maybe use a tool like AntRenamer to rename your files.
It is probably the easiest way.